So many plans for world domination, such tiny little resin hands...

So many plans for world domination, such tiny little resin hands...
 This took a lot of patience to finally get into my hands. It kept going on backorder every time I had the extra ten bucks to treat myself to it. Finally the planets aligned, and six weeks after I pressed the "submit" button, I have Amigurimi: Animal Friends in my possession.
There are nine critters to knit in here, and being new to knitting toys I like that they're all ranked "easy". I started with the little chicken, since I had all of the yarn colors readily available in Knit Picks Palette, even though it was the sweet owl on the cover that originally won me over.
The book recommends US size 6 (4mm) needles for all of the projects. No swapping needle sizes in the middle of things, so it goes very quickly. In just an hour and half I had the head done, except for the eyes. I haven't knit on straight needles for a long time, so that was an adjustment, and I know it slowed me down. I'm going to eventually purchase myself either shorter straight needles, or more likely round out my supply of DPNs and just use a point protector at one end to make a suitably short needle to work with. My wrists will thank me later.
 Click to enlargeOne thing I will do on the next project is try working with two strands of yarn at once, or go down at least one needle size. Since I made this just for decoration, I don't anticipate any issue with stuffing coming out between the stitches, but if I were to make this to give to a kid, I'd want a much tighter fabric. I don't think this would hold up under play very well as is, but that could also be the result of my knitting gauge. (I almost never swatch. Shh! Don't tell the universe!) Plus at seven inches tall for the critters, they're a little big for just decoration. I'd like to see how far down I can go in needle size (and potentially down to lace weight yarn held double) and still get a cute critter, without hurling colorful curses towards the heavens for not being able to just leave well enough alone.
I think even beginners to knitting would be able to produce a cute critter in a short amount of time. There's no knitting in the round. There are some uses of short rows, but the instructions are easy to follow. You have to cast on in the middle of the row to create toes ad tails, but that just takes some practice to get the hang of. It's basically creating your own little tiny pieces of fabric, then sewing up the seam, and then sewing that piece into place. If you've sewn toys before, like I have, it's mostly intuitive. The pictures are huge, so you have a great guideline to help you make sure you're putting beaks, waddles, wings, and eyes in the right spot.
 Click to enlarge
 Click to enlargeFor roughly a dollar a pattern, this book is an excellent deal, in my opinion. I've been wanting to knit toys for quite a while, and even have several patterns stockpiled in my Ravelry queue. Maybe because Amigurumi: Animal Friends is short, sweet, and to the point, I didn't feel intimidated to dive in and try one. It could also be that with Easter right around the corner, my lovely dolls were asking very nicely for something cute and springy to brighten up their area of the house. I know several of them actually meant a new dress, but by now they should realize how easily distracted I am by knitting...
More pics posted in my Gallery!
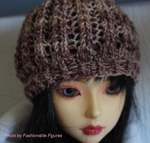
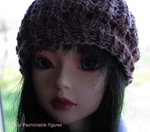
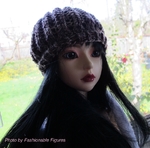
 Click to enlargeI love knitting hats, both for humans and dolls. It's one thing I don't need a pattern for, and can test out yarn and stitches.
In this case I'm also using up a bit of the leftover yarn from my socks. And appeasing my demanding dolls, who were none too happy to see that I knit myself a pair of socks before something for them. This is a small offering, but I've been told it will do for now.
These were knit on my size 1 (2.25mm) DPN, again with the Tofutsies sock yarn. The yarn has lots of dark pink and lavender throughout, so it's girly without being so cutesy you just want to vomit.
 Click to enlargeThis hat was sized for a 22" ball joint doll. Modeling is my lovely Elfdoll Sooah. She's an odd girl in that she has the head sculpt from Elfdoll, but that head is on the taller body of a Model Doll from Dollmore. I love her face sculpt, because even though she's missing her eyelashes (the perils of purchasing used), she's extremely photogenic.
 Click to enlargeThis hat probably won't go up for sale anytime soon on Etsy, mostly because I don't have anything else to list along with it yet. Plus I may have to wait for my little resin family to tire of some of the pieces before I dare to sell them.
I'm not sure what will be next up for a project, but most likely it will be some springy-themed dress for one of my ladies. The sun is out, the flowers are blooming, and my stash of fabric is threatening to topple and engulf me. I can't let that happen, since no one would be able to hear my muffled cries for help under the weight.
Keep checking back for more pretty things!
For those interested, the simple pattern for this hat is:
Cast on 48 stitches. Join for knitting in the round. (I cast on one extra stitch, and knit 2tog at the beginning of the round.)
*K1 TBL (through back loop), P1; repeat all the way around. Repeat this row for 5 rows.
Knit 1 row.
 Click to enlargeIncrease row: K3, m1 all the way around. You should end up with 62 stitches total at the end of the round.
Knit 1 row.
Begin pattern:
Row 1: *K2, yo, K2tog; repeat for entire round
Row 2: *K2tog, yo, K2; repeat for entire round
Repeat these two rows until the hat is the height you want. I did approximately 25 rows to get about 4 inches from the cast on edge.
Decrease rows:
Row 1: Knit all the way around.
Row 2: *K2tog all the way around
Repeat these two rows until you have 9 stitches left.
I then got down to 3 stitches by K2tog, slipping the completed stitch back onto the left needle, then K2tog again. I knit this on three active DPNs, so I repeated this on each of the three needles to get down to just 3 live stitches.
Break yarn. Draw yarn through these last three stitches and pull tight. Weave in ends.